Tag Archives: suricata

PFSense, Suricata, and Splunk: mildly complicated, but very doable

I run a home lab, with a bunch of VMs running vaguely security-related tools, with a PFSense router in front of everything. On PFSense, I am running Suricata on several interfaces. I also collect the data in to a Splunk instance (❤️ developer license).

The Problem

You can forward data into Splunk with syslog. Ingesting syslog in to Splunk is not the easiest way to collect data – ideally you want to use a Splunk Universal Forwarder – (n.b. do not configure Splunk indexers or forwarders to listen for syslog directly! Use a dedicated syslog server!), but PFSense can forward its syslog natively, and Suricata alerts get written to syslog – so why not use that?

Well, because the data that Suricata puts in a syslog event is next to useless.

02/28/2023-20:18:38.695473  [**] [1:2016683:3] ET WEB_SERVER WebShell Generic - wget http - POST [**] [Classification: Potentially Bad Traffic] [Priority: 2] {TCP} 118.232.97.242:56937 -> <REDACTED>:80

A signature name, a source, and a destination. That’s it. Nothing to really let you understand what was happening underneath. What you really want is the Suricata eve.json output, which PFSense very helpfully allows you to enable. This contains a wealth of data, like the raw packet (in base64), decoded protocol elements like HTTP request headers, the URL, a DNS query – but although you can view these in the PFSense web UI, they are not covered by the native log management. What else could we use?

Splunk is easiest when you use a Splunk forwarder. Always use one when you can! However, sometimes it’s not the right choice… technically you can run the Forwarder on PFSense, as it’s FreeBSD, and there is a FreeBSD build of the forwarder. However, it has some drawbacks: you’ll find that although you appear to be able to enable boot-start, it doesn’t actually work. PFSense manages the set of services that run at boot and anything that is not an official PFSense package won’t get started. I’d been running it like this for ages, and given that I only rebooted my firewall once every six months or so, it was only a minor headache. If you’re running it as a production box though, that’s very much not ideal!

So, syslog is out, and a Splunk forwarder is problematic. What next?

Enter syslog-ng

PFSense is extensible, with a number of officially maintained add-on packages. Suricata is one. Another is the versatile syslog management engine, syslog-ng. Almost any way you can imagine of moving a log from one place to another, syslog-ng can do it for you. It could certainly scoop up files that aren’t covered by PFSense’s default syslog forwarding, and send them over to a syslog receiver. But. But.

syslog-ng can also write directly to the Splunk HTTP Event Collector (HEC). In fact, this is exactly what the Splunk Connect 4 Syslog package is under the hood – syslog-ng with a bunch of wrapping around it to make configuring it for a large number of Splunk inputs a bit less work. We don’t have that handy wrapping in PFSense, but it will absolutely let us do the necessary config manually, using an officially PFSense supported method. This post is therefore a step-by-step on how to set that up.

1. Groundwork

1.1 Splunk

You will need to have Splunk HEC set up. This part is covered by Splunk training (look in particular at the System Admin, Data Admin, and Architecting courses) and documentation so I will not rehash it here. However, as a brief summary, you will need to:

  • enable HEC and generate tokens
  • configure a load balancer (this is a non-Splunk item, but it is a critical step if you have a Splunk deployment with multiple indexers; do not direct HEC output at just one indexer in a cluster, it will do bad things to your Splunk deployment)

Tokens for a single-instance deployment can be found in Settings > Data Inputs > HTTP Event Collector. A HEC token looks like this in Splunk Web:

Extract from Splunk web interface showing a token named "sample_token", the edit/disable/delete links, and the token itself which is a GUID-style string of multiple hexadecimal blocks joined by dashes

Consult the documentation linked above for information about how to obtain the token if set up in a distributed deployment.

1.2 PFSense

  • Go to the System > Package Manager screen, search for the syslog-ng package, and install it

1.3 Network

Your PFSense device needs to be able to connect to the address of the HEC endpoint, on the appropriate port. The default port Splunk uses for this purpose is 8088. If using a load balancer, it must be able to connect to all Splunk indexers on the relevant port, and your PFSense device must also be able to connect to the load balancer. Test both of these things before starting to configure syslog-ng.

If you are intending to use a hostname to specify the Splunk instance / load balancer address, make sure that PFSense can resolve the hostname.

2. Configure syslog-ng

The most basic syslog-ng configuration has 3 components: a source, a destination, and a log directive that instructs syslog-ng to send source X to destination Y. The configuration needed for this use case is only a few minor tweaks away from this baseline. To begin configuring, navigate to Services > syslog-ng in the PFSense admin interface. You quite likely will not need to alter anything under the General tab. Configuring specific logging settings is done under the Advanced tab. Click Add to start writing a config.

2.1 The source

The “Object Type” for a source must be… Source. Sorry, no prizes for guessing that one.
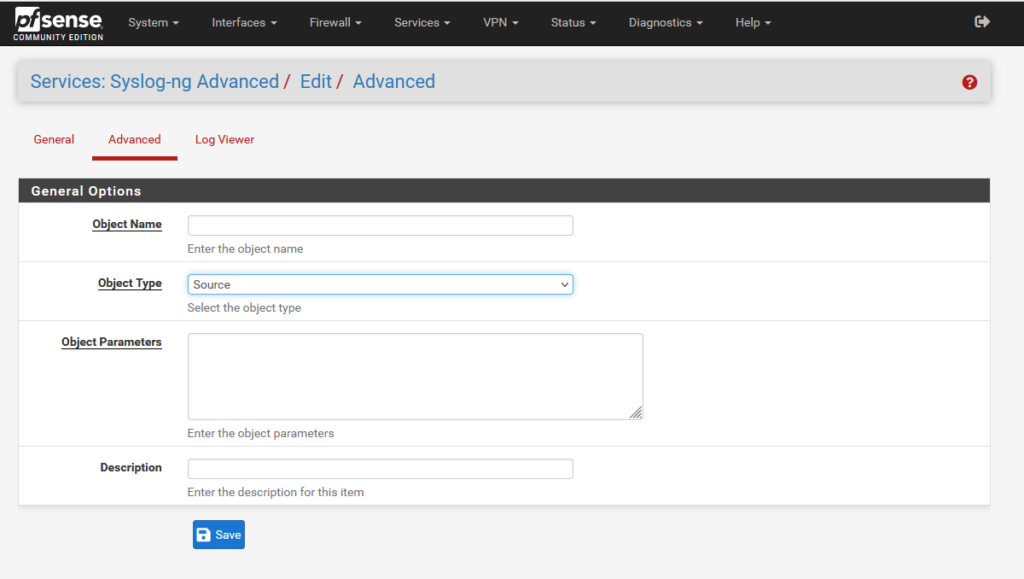
Editing a config of syslog-ng in PFsense. There are blank fields labelled "Object Name", "Object Parameters" and "Description"; and a dropdown "Object Type" selected on "Source"

The “Object Name” is a unique identifier for the config stanza you are defining. There are few strict limitations, but it is a recommended convention to prefix source config names with “s_”, destination names with “d_” etc. The remainder should be brief, but descriptive. This config is to read the Suricata eve.json log files, so I have named it “s_suricata_eve_json”.

The “Object Parameters” define what is actually going to happen. To determine what to set, we must understand where and how the data we want to send exists.

PFsense stores Suricata logs in /var/log/suricata. It can run multiple instances of Suricata, one for each firewall interface. Every instance of Suricata gets its own directory within this path, and the logs are in these subdirectories.

Command line listing of /var/log/suricata showing multiple directories named after interfaces

We could write a separate source stanza for each individual file, manually specifying the interface name. However, that way you would need to edit the config whenever you set Suricata on a new interface. We can instead watch all the directories at once.
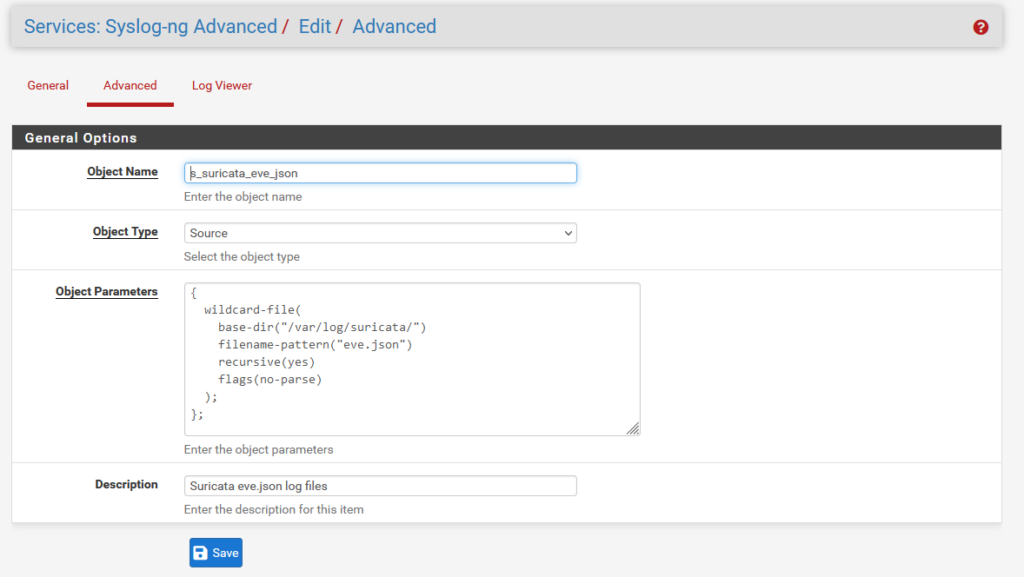
Editing a config of syslog-ng in PFsense, showing an object of type "Source" with the title s_suricata_eve_json

The wildcard-file option allows collecting multiple files, and can recursively search directories from a specified base path. That’s perfect for our use case. We specify the base-dir option to /var/log/suricata, set recursion to “yes”, and read all files named “eve.json”.

Additionally, the “no-parse” flag is set. This is because the default behaviour of syslog-ng is to attempt to interpret all messages as RFC-compliant syslog messages, where there is a set of default header fields such as syslog priority, timestamp, and host. Suricata eve.json events consist of a JSON object, with no header; trying to parse a syslog header from this results in improperly formatted JSON (and we need it to be valid JSON when it is sent to Splunk). This is the resulting definition:

{
  wildcard-file(
    base-dir("/var/log/suricata/")
    filename-pattern("eve.json")
    recursive(yes)
    flags(no-parse)
  );
};

Write a brief description, save this configuration, then click Add again for the next one.

2.2 The destination

You need to direct the events which are found in the source to your Splunk HEC receiver. Set the “Object Type” as “Destination”. My destination is labelled “d_splunk_suricata_hec”.

The syslog-ng option that allows sending data to HEC is the http() function. In this function we will define the destination (HEC endpoint host and the path “/services/collector/event” which is where Splunk HEC listener receives data), the token generated in step 1.1, and the HTTP body. The body is a JSON object with a specific set of fields that Splunk expects.
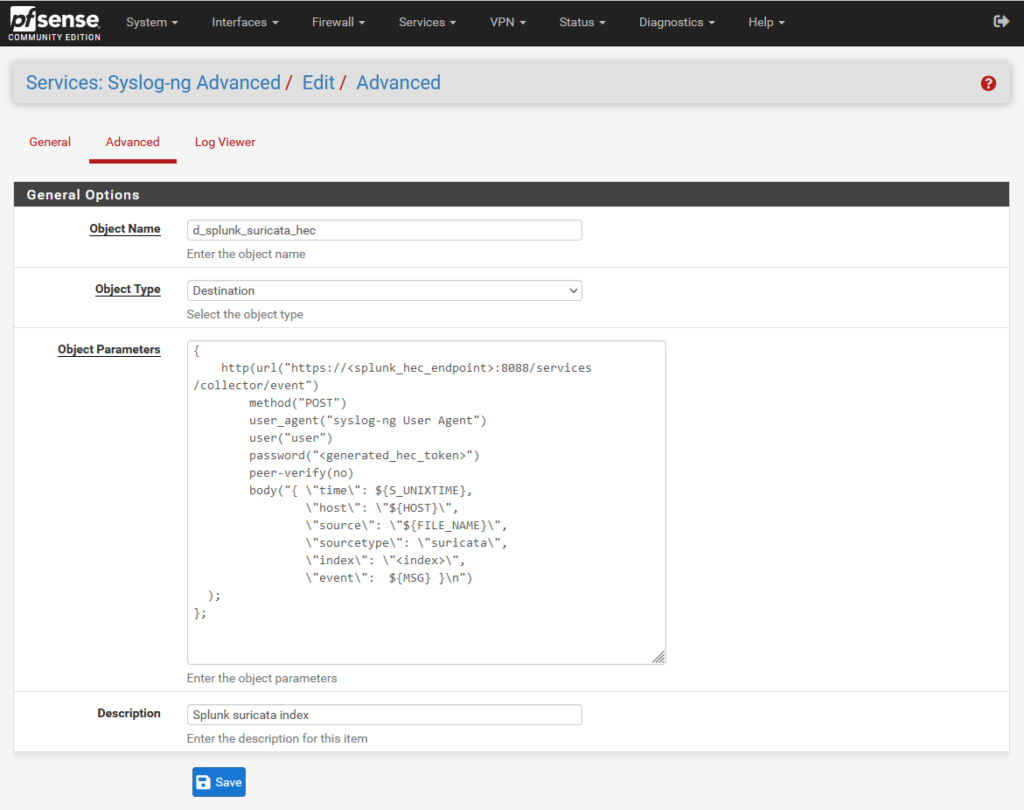
PFSense screenshot showing editing of a syslog-ng config set up to send to Splunk HEC

You must replace several elements of this with values specific to your environment:

  • <splunk_hec_endpoint> should be the IP or hostname of your load balancer, or of the Splunk instance if it is an all-in-one instance
  • <generated_hec_token> should be replaced with the token generated in step 1.1
  • In an ideal environment, you will be using proper certificate management with PKI; instead of setting peer-verify(no), you would load your organisation’s certificates into PFSense
  • <index> should be changed to the Splunk index you wish the logs to be sent to

After changing the values it should look something like this:

{
    http(url("https://172.16.3.9:8088/services/collector/event")
        method("POST")
        user_agent("syslog-ng User Agent")
        user("user")
        password("eb2cb049-3091-4b82-af1e-da11349a5e2b")
        peer-verify(no)
        body("{ \"time\": ${S_UNIXTIME},
                \"host\": \"${HOST}\",
                \"source\": \"${FILE_NAME}\",
                \"sourcetype\": \"suricata\",
                \"index\": \"suricata\", 
                \"event\":  ${MSG} }\n")
  );
};

Write a brief Description, save the configuration, and click Add to start writing the final part.

2.3 The log directive

Now that a source and destination have been defined, they can be connected together with a third stanza, where the “Object Type” is “Log”. This is the simplest of the three, and looks like so:
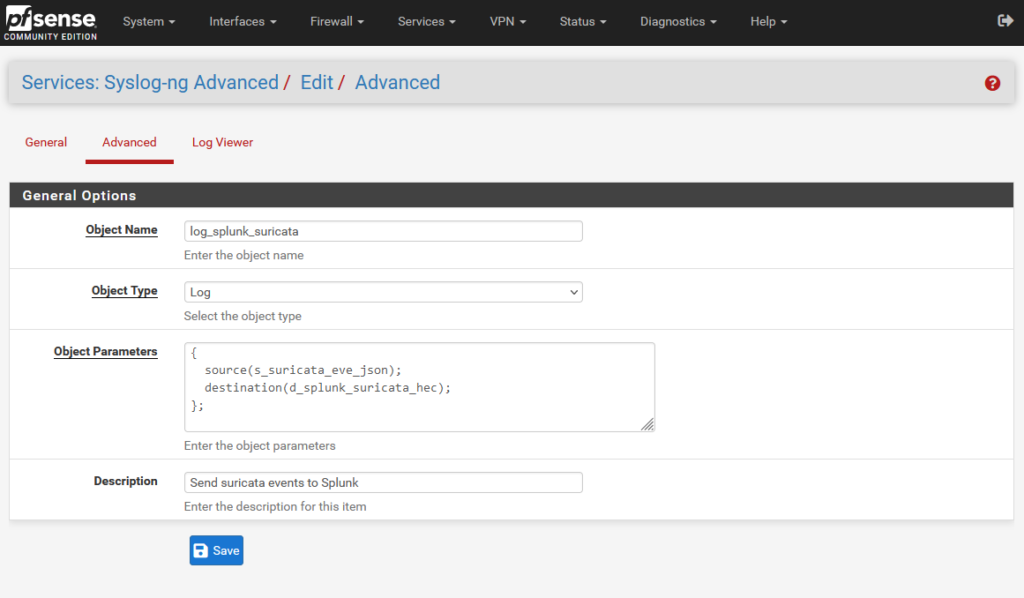
PFSense admin page showing a syslog-ng log stanza being configured

The source() function uses the Object Name chosen in step 2.1; the destination() function takes the name chosen in 2.2. Add these in, set an object name and description for this stanza, and save – and you should be rolling!

{ 
  source(s_suricata_eve_json);
  destination(d_splunk_suricata_hec); 
};

3. Checking your work

The first place to look is in the index you set as destination for Suricata events. Depending on how busy the device is, you might get dozens of events a minute, or only a few per hour. If you don’t see anything, try looking in the following places to see why:

3.1 Suricata logs on PFSense

You can see the events as they are written on the device under Services > Suricata > Logs View. If you have command line access you can also look in the filesystem at /var/log/suricata/<interface name>/eve.json.

3.2 syslog-ng logs on PFSense

Under Services > syslog-ng > Log Viewer, you can see recent messages from the syslog-ng service. Possible errors you could see here, and their causes include:

error sending HTTP request; url='https://<your host>:8088/services/collector/event', error='Couldn\'t resolve host name' 

PFSense could not look up the specified hostname via DNS; redo step 1.3

curl: error sending HTTP request; url='https://<your host>:8088/services/collector/event', error='SSL peer certificate or SSH remote key was not OK' 

the certificate is not trusted – you should specify peer-verify(no) if this is expected

Server returned with a 4XX (client errors) status code, which means we are not authorized or the URL is not found.; url='https://<your host>:8088/services/collector/event', status_code='400' 

the request wasn’t formatted correctly; you may have made a typo when constructing the text in the body() function

3.3 HEC logs in Splunk

If syslog-ng connects successfully but submits bad information, Splunk HEC will log an error. You can search for this with:

index=_internal component=HttpInputDataHandler

If the problem is badly formatted data, the messages aren’t hugely informative, but they are at least enough to confirm roughly what’s going on.

10-11-2023 20:31:45.580 +0100 ERROR HttpInputDataHandler [23746 HttpDedicatedIoThread-0] - Failed processing http input, token name=pfsense_syslog_ng, channel=n/a, source_IP=<syslog-ng source IP>, reply=6, events_processed=0, http_input_body_size=1046, parsing_err="While expecting event object key: Unexpected character: ':', totalRequestSize=1046"

When I encountered this, the only way I could think of to see what the problem was, was to write a second destination for syslog-ng where it would write events to a new file, using the same formatting text used in the body() function of the http() destination. I could then read the file and figure out which bit of the JSON was incorrect.

Hopefully now that I’ve shown exactly which bits to alter in this guide, you won’t have a need for that level of debugging! If you find messages like this, first re-read section 2.2 and check your destination stanza very carefuly against the example, for missing or extra characters.

4. Wrap up

If all went well, you now have all the eve.json events in Splunk, in all their lovely detail. If this has been helpful, I’d love to hear from you – or if there’s anything wrong or missing, please let me know. Happy Splunking!
Sandbox networking, packet capture, and IDS

20,000 Leagues Under The Sand: part 3

read part 2

Just as important to a sandbox as identifying actions the malware took on the host is observing its behaviour on the network. These days malware is almost guaranteed to have network activity; understanding how a sample is communicating is often all that is needed to tell you what the malware is.

When setting up a sandbox, careful thought needs to be given to your networking setup. Most malware is concerned only with reaching its command and control (C2) servers, but in the past year multiple malware families have seen lateral movement capabilities added, helped in no small part by the release of the EternalBlue SMB exploit. Under no circumstances should traffic from your sandbox VMs have unrestricted access to your network. Fortunately, most hypervisors’ default options make it simpler to do it safely than not – just be aware of the potential.

Additionally you should consider attribution and evasion; malware authors police the origins of connections and are known to blacklist the addresses of AV vendors, security researchers, and tor. If you would rather not have your IP on one of these lists you should think about how you can control the way malware traffic exits your network. Possibly the safest way is to route your traffic out through a consumer ISP that dynamically assigns IP addresses – so you might not need to do anything, as a large proportion of ISPs use this as their default. If you have static addressing and can’t afford a second line to your property, you might be able to set this up with a 4G router and data plan. At the minute, my sandbox is routing via tor as I do not have the option of a dynamic IP without spending more money, and I would prefer to risk some malware not functioning over advertising my IPs.

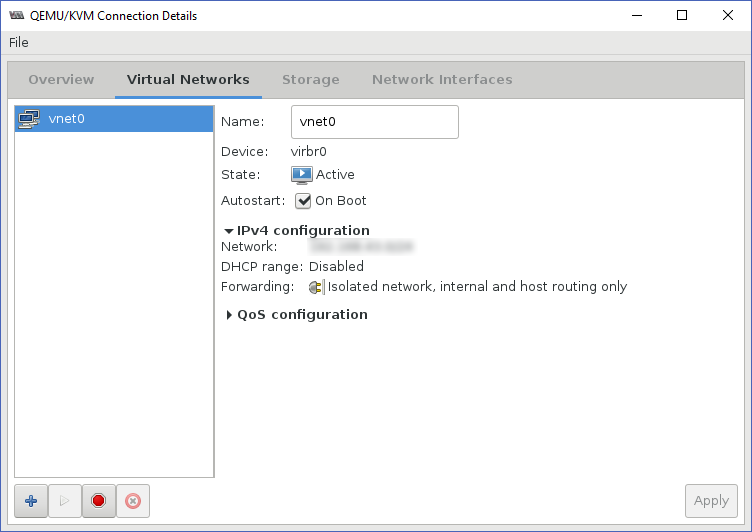
Whichever way you route your traffic, it is pretty simple to capture the output and perform intrusion detection when using qemu/Libvirt. In order to route traffic from VMs, it is necessary to create a virtual network interface.

Libvirt network configuration

Libvirt network configuration

This interface will be added to your system’s available network interfaces and is valid for use with tcpdump, Suricata, etc. N.B. when listing IPs/interfaces with ‘ip addr’ you will see the virtual bridge interface and virtual network listed separately, and the IP/subnet you have assigned will be defined on the bridge interface (named virbr0 or similar). Be careful about your choice of which interface to capture on; there are potential pitfalls for each. 

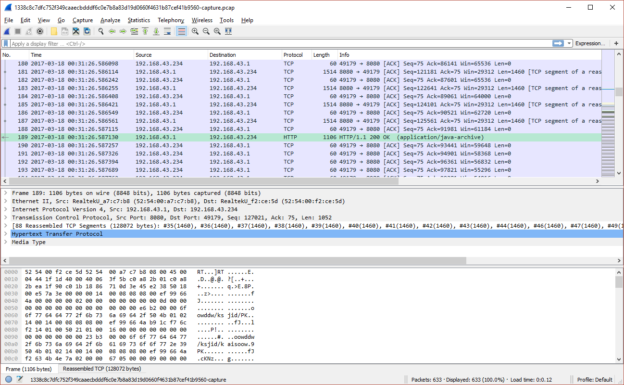
Firstly, the virtual bridge interface. When initially creating this post I encountered an issue with capturing at the virbr0 in which inbound packets for a TCP session had the correct source/destination IPs, but outbound packets showed the destination as being the gateway IP for the virtual network. As a result Suricata, Wireshark, and other tools could not reassemble the sessions correctly. I never identified precisely why this was so; unfortunately this means I cannot provide any specific advice for avoiding or fixing it other than to say it was probably related to the packet-rewriting rules being used to redirect traffic to tor.

I then switched to capturing on the virtual network, vnet0. This solved the problem of the inbound/outbound mismatches, however a capture (or Suricata inspection) on this interface will cease to function when there are no active attached hosts and will not start again unless the capture/IDS process is restarted. Thus if you are running a single VM as I have been and it reboots, your pcap and IDS processes will exit prematurely and will not resume when the VM does.

1: lo: <LOOPBACK,UP,LOWER_UP> mtu 65536 qdisc noqueue state UNKNOWN group default qlen 1
 link/loopback 00:00:00:00:00:00 brd 00:00:00:00:00:00
 inet 127.0.0.1/8 scope host lo
 valid_lft forever preferred_lft forever
 inet6 ::1/128 scope host
 valid_lft forever preferred_lft forever
2: ens192: <BROADCAST,MULTICAST,UP,LOWER_UP> mtu 1500 qdisc mq state UP group default qlen 1000
 link/ether 00:0c:29:3b:c7:47 brd ff:ff:ff:ff:ff:ff
 inet 10.0.0.4/24 brd 10.0.0.255 scope global ens192
 valid_lft forever preferred_lft forever
 inet6 fe80::20c:29ff:fe3b:c747/64 scope link
 valid_lft forever preferred_lft forever
3: virbr0: <BROADCAST,MULTICAST,UP,LOWER_UP> mtu 1500 qdisc noqueue state UP group default qlen 1000
 link/ether 52:54:00:ba:65:0e brd ff:ff:ff:ff:ff:ff
 inet 10.0.3.1/24 brd 10.0.3.255 scope global virbr0
 valid_lft forever preferred_lft forever
4: virbr0-nic: <BROADCAST,MULTICAST> mtu 1500 qdisc pfifo_fast master virbr0 state DOWN group default qlen 1000
 link/ether 52:54:00:ba:65:0e brd ff:ff:ff:ff:ff:ff
28: vnet0: <BROADCAST,MULTICAST,UP,LOWER_UP> mtu 1500 qdisc pfifo_fast master virbr0 state UNKNOWN group default qlen 1000
 link/ether fe:54:00:51:49:d6 brd ff:ff:ff:ff:ff:ff
 inet6 fe80::fc54:ff:fe51:49d6/64 scope link
 valid_lft forever preferred_lft forever

■ breaks when VM is shut down or restarted
■ may encounter issues with packet rewriting/tcp reassembly

Once the networking is set up, you can then deploy IDS to monitor it. There are two choices to consider, Snort and Suricata, and of these, the latter is so simple to get running that I’m largely mentioning the other to be charitable. Since versions and options change every few months I am not going to lay out a configuration; it would probably be obsolete by the time you read this. I will however highlight a couple of options in the current version (4.0.4 at the time of writing) of Suricata that deserve special mention.

eve-log: This is a catch-all log which can be configured to contain many different event types. Suricata can log metadata for many different protocols and situations including HTTP, DNS, TLS certificates, transferred files (e.g. HTTP downloads) including hashes, SMTP, and more. Almost all of this information is potentially useful in the context of a sandbox. While it is possible to spin off separate logs for each of these items, the JSON structure of the output makes it easy to parse and having them all together is convenient. Suricata supports rotating this log, naming according to a timestamp pattern, and setting custom permissions, all of which can be very handy.

rule-files: These are your detections, choose them wisely. The biggest bang for your buck is in the Emerging Threats community ruleset (free!), but not all of them will be applicable to a sandbox.  You should consider disabling ones which are irrelevant; for example, ‘inappropriate’, ‘icmp’, ‘mobile_malware’, ‘games’, and ‘scada’ are unlikely to be applicable.

Similarly your packet capture should be done on the virtual network interface and not the bridge. For capturing packets there are a wealth of options, of which I have tried a number. Here are some of the highlights:

tcpdump: the obvious first choice as it’s what everyone’s used to, but for a permanent capture service, not the best one. Will output to a single specified file until cancelled and restarted with a different destination, meaning that the process of managing the output is entirely down to you.

scapy: this was my choice for a long time due to it being possible to control from within python. However, if you are running more than one sandbox VM and want simultaneous capture of traffic from multiple sources, this is not an efficient choice.

pyshark/tshark: another python library, and the underlying tool called by pyshark; the latter efficiently captures everything, and unlike TCPdump, has the ability to manage rotation of capture files itself.

dumpcap: the base utility underlying tshark’s packet capture. tshark is possibly overkill as it is capable of far more than simply capturing packets. This is the method I am using at the time of writing.

For example, an hourly cron script as follows should create 24 one-hour pcap files, overwritten each day:

HOUR=`date -u +'%H'`
dumpcap -i vnet0 -a duration:3600 -q -w /usr/local/unsafehex/antfarm/pcaps/$HOUR.pcap -f "<your filters here>"

Note the -u flag passed to date; when trying to make sense of events and logs, it is crucial to ensure that your time information lines up. The simplest way to do this is to log everything in UTC; if desired you can convert to local time when presenting the information to the user. Also, use the main crontab as cron.hourly entries don’t necessarily run on the hour mark and it is important for this concept that each file matches the hour span that it is named for.

As well as capturing the output and running IDS signatures against it, you may want to consider performing SSL interception. This is a complicated topic and I have not mastered it, so I will not attempt to offer complete instructions at this point. However I will give a few pointers based on what I know so far. The simplest means of performing SSL interception for you is likely to be the squid proxy and its ssl_bump feature. This can be done as an explicit proxy (you will need to configure your client) or as a transparent proxy. In either case you will need to install the certificate you have made into the client as a trusted root.

SSL intercept does not play nicely with tor. It may be possible to still get it working with some routing/iptables magic, but the normal choice for routing squid through tor of using priovxy as a parent will not workEven if you do get your traffic routed through a proxy to tor, beware of DNS leakage. Using privoxy as the parent combats this; if you bypass this stage you will need to come up with a new solution for preventing DNS leak. I plan to integrate SSL intercept but only once I have the option of a dynamic IP.

There are other tools that you might consider using with your network traffic inspection, such as the metadata-logging framework Bro; however with recent updates, Suricata’s metadata capture is so powerful that it’s unlikely you’ll need anything else.

In the next post I discuss automating the delivery and execution of malware to the guest VM, and simulating user interaction.

Bonding rituals

I may have been quiet on here but not because I haven’t been doing lots of fun nerdy stuff. Unfortunately, there’s a fair amount of it that can’t be blogged about, hence the lack of new material here, but a problem came up the other day that was a royal pain in the ass pretty fun and interesting, and maybe some folks out there might be scratching their heads over it and appreciate there being something in the depths of t’interwebs to explain it.

Bonding is a pretty damn useful thing, especially to us NSM folks. Take a 1×1 tap and run the output cables up to a nice bit of tin running $distro_of_choice, a few minutes of tweaking interface config files, and hey presto! a bonded interface with both directions of traffic for Snort/Suricata/Bro/whatever to listen to, and your kit is safely out of line where the sysadmins can’t blame you when something breaks and takes out the internet (they’ll probably still try though).

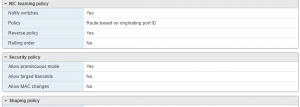
So far, so standard. The other day I needed to do this in a VM – no problem, I thought. VMWare will let you pass traffic through to the guest; you need to put the switch into promiscuous mode because the interface in your guest/sniffer won’t have an IP assigned, which you can do in the vSwitch Security Policy.

With each output of the tap assigned its own vSwitch which was attached to an individual interface on the guest, I created a bond interface to combine the two. In the very best tradition of here’s one I made earlier let someone else make and plagiarised shamelessly, you can read a good guide here.  One notable exception – use mode 0 (round robin) and not  active/passive – we want to combine the outputs, instead of having the second only work if the first fails.

So, having done that, I brought up the bond0 interface and… weirdness happened. I was only seeing one side of the traffic. tcpdump on the bond0 interface was only showing the responses, not the requests. The slaved interfaces told a similar story, one had traffic (inbound), and the other was silent. Odd. Next check, was the ESXi host seeing the traffic but not passing it through? Checking this requires the use of pktcap-uw rather than VMWare’s implementation of tcpdump, which will not let you look at traffic on individual vSwitches. This showed the traffic was indeed present.

Proper head-scratching time now. The interface settings were all correct, the problem persisted through restarts of the interfaces, the networking service, even the OS. Next step was bringing up each interface manually one at a time; now it got even weirder. eth1 showed responses as expected. eth2 showed requests – awesome! bond0 showed… just the responses. Checked eth2 and it was now silent as the grave. Curses! This didn’t change when bond0 was shut down again; outbound traffic would only reappear when eth2 was brought up without bond0. Enabling bond0 killed it again until it was started without bond0 running. What the hell?

Having pretty much run out of ideas, a bit of experimentation was on the cards, starting with the ESXi config settings. This was clearly a stroke of genius, because upon setting MAC address changes to ‘accept’, it instantly started working. Why would this be?

One of the things that enabling bonding does is that the bond0 interface defaults to starting with the MAC of the first interface to join the bond. In round-robin mode, it then shuttles its MAC address around each interface to receive frames; VMWare’s (sensible) default is to ignore changes like this, and as a result, will stop transmitting traffic to the interface it sees as having violated the restriction until the interface is bounced. Thus, the first slave to join will receive traffic because its MAC stays the same, and the second stops being sent data because the vSwitch has seen its MAC change. Permitting changes on the vSwitch means the MAC can be assigned as necessary.

TLDR: If you want to use a bonded interface in an ESXi guest like this, you must set ‘Allow MAC address changes’ to accept on the vSwitches the slave interfaces connect to.